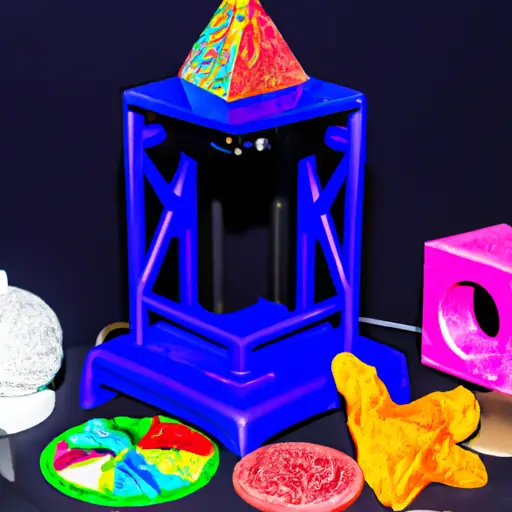
In the world of additive manufacturing, the 3D printer stands as an embodiment of innovation and precision. Like the intricate workings of a well-oiled machine, the key components of a 3D printer come together to form a symphony of manufacturing prowess.
From the extruder and hotend to the control board and firmware, every element plays a crucial role in bringing digital designs to life layer by layer.
Join us as we delve into the anatomy of a 3D printer and unravel the secrets behind its remarkable capabilities.
Extruder and Hotend
The extruder and hotend are two crucial components of a 3D printer that play a vital role in the printing process.
The extruder is responsible for feeding the filament into the printer, while the hotend melts the filament and deposits it layer by layer to create the desired object.
Proper maintenance of the extruder is essential to ensure smooth printing operations. Regular cleaning of the gears and nozzle is necessary to prevent clogs and maintain consistent filament flow. Additionally, lubricating the moving parts of the extruder can help improve its performance and extend its lifespan.
Troubleshooting hotend issues is also a critical aspect of 3D printer maintenance. Common problems include filament jams, inconsistent extrusion, and uneven heating. To address these issues, it is important to check for any obstructions or damage to the nozzle, as well as calibrate the temperature settings.
Regularly inspecting and replacing worn-out or damaged components can help prevent hotend issues and ensure high-quality prints.
Build Plate
The build plate is a crucial component of a 3D printer, serving as the foundation for the printed object. Its main function is to provide a flat and stable surface for the first layer of the print to adhere to.
When it comes to material options, common choices for build plates include glass, aluminum, and specialized build surfaces like PEI or BuildTak.
The size of the build plate is also important, as it determines the maximum dimensions of the objects that can be printed on the 3D printer.
Function of Build Plate
The build plate plays a crucial role in ensuring proper adhesion and stability during the 3D printing process. It serves as the foundation upon which the object is printed layer by layer. To understand the function of the build plate, it is essential to consider the following:
-
Build Plate Maintenance: Regular maintenance of the build plate is necessary to ensure optimal performance. This includes cleaning any debris or residue that may accumulate during the printing process and checking for any signs of wear and tear.
-
Build Plate Adhesion Techniques: Achieving proper adhesion between the build plate and the printed object is essential to prevent warping or detachment. Different techniques such as using adhesive sprays, tapes, or specialized build surfaces like PEI or BuildTak can be employed to enhance adhesion.
-
Stability and Leveling: The build plate must be stable and properly leveled to ensure accurate and consistent printing. Leveling adjustments may be required before each print to compensate for any variations or unevenness in the plate’s surface.
Material Options for Build Plate
One important consideration when choosing a material for the build plate is its ability to withstand high temperatures and provide adequate adhesion. There are several different build plate materials available, each with their own pros and cons.
One popular material option is glass. Glass build plates offer excellent flatness and can withstand high temperatures, making them suitable for printing with a wide range of materials. However, glass plates can sometimes have poor adhesion, especially with certain materials like ABS. To improve adhesion, using a thin layer of glue stick or applying a heated bed can be helpful.
Another option is aluminum. Aluminum build plates are known for their durability and heat conductivity. They provide good adhesion for most materials and can be easily cleaned. However, they can be prone to warping over time.
Other materials, such as PEI sheets or buildtak, offer different advantages and disadvantages. It is important to consider the specific needs of your prints and experiment with different materials and build plate adhesion methods to achieve the best results.
Importance of Build Plate Size
Significantly, the build plate size plays a crucial role in the overall 3D printing process. The build plate, also known as the printing bed, is the surface on which the object is printed.
Here are three reasons why the build plate size is important:
-
Print Volume: The build plate size determines the maximum dimensions of the objects that can be printed. A larger build plate allows for the creation of larger or multiple objects in a single print job.
-
Material Usage: The build plate size affects the amount of material required for each print. A larger build plate can accommodate more objects, reducing material wastage and optimizing print efficiency.
-
Adhesion Techniques: The build plate size influences the choice of build plate materials and adhesion techniques used. Larger build plates may require different materials or adhesive methods to ensure proper adhesion and prevent warping or detachment during the printing process.
Filament Spool Holder
The filament spool holder is a crucial component of a 3D printer. It ensures proper alignment and smooth feeding of the filament during the printing process.
It is important to choose a spool holder that is compatible with the type and size of filament being used. Different materials may require different storage conditions.
Users have the option to either purchase a pre-built spool holder or construct their own. This choice depends on their specific needs and preferences.
Importance of Proper Alignment
An essential aspect of ensuring optimal functioning of a 3D printer lies in the establishment of precise alignment for the filament spool holder. Proper calibration of the spool holder is crucial for consistent and smooth filament feeding during the printing process. Here are three reasons why proper alignment of the filament spool holder is important:
-
Prevents filament tangling: When the spool holder is not aligned correctly, the filament can become tangled, leading to print failures and wasted material. Proper alignment ensures a smooth and uninterrupted flow of filament.
-
Reduces friction: Misalignment can cause the filament to rub against the spool holder, creating unnecessary friction. This friction can lead to filament breakage or uneven feeding, resulting in poor print quality.
-
Facilitates troubleshooting: If you encounter issues with filament feeding or extrusion, the first step is to check the alignment of the spool holder. Correct alignment eliminates this potential problem and allows you to focus on other troubleshooting tips.
Material Compatibility and Storage
Several factors must be considered when it comes to material compatibility and storage for the filament spool holder in a 3D printer. The material compatibility refers to the type of filament that can be used in the printer. Different materials have different melting points and properties, so it is important to choose a filament that is compatible with the printer’s extruder temperature and nozzle size. Additionally, the storage of the filament spools is crucial to maintain their quality. Exposure to moisture and dust can affect the printing process and the final print quality. To ensure proper storage, filament spools should be kept in airtight containers or vacuum-sealed bags. A table below illustrates the compatibility of different materials with common 3D printer types and their recommended storage methods.
| Material | FDM Printers | SLA/DLP Printers | Recommended Storage |
|---|---|---|---|
| PLA | Yes | No | Airtight container |
| ABS | Yes | No | Vacuum-sealed bag |
| PETG | Yes | No | Airtight container |
| Nylon | Yes | No | Vacuum-sealed bag |
| TPU | Yes | No | Airtight container |
| Resin | No | Yes | UV-resistant container |
| HIPS | Yes | No | Airtight container |
| PVA | Yes | No | Vacuum-sealed bag |
| Wood-filled | Yes | No | Airtight container |
DIY Vs. Pre-Built Options
When considering the filament spool holder for a 3D printer, it is important to compare the DIY options with the pre-built options available on the market.
Here is a cost comparison and a list of pros and cons for each option:
-
DIY Options:
- Cost: DIY options are generally cheaper as they involve sourcing and assembling the materials yourself.
- Pros: Allows for customization and modification to suit individual needs. Can be a fun and rewarding project for makers and enthusiasts.
- Cons: Requires time and effort to gather the necessary materials and assemble the spool holder. May lack the same level of stability and durability as pre-built options.
-
Pre-Built Options:
- Cost: Pre-built options are typically more expensive due to the convenience and quality assurance they offer.
- Pros: Ready-to-use out of the box, saving time and effort. Designed and manufactured by professionals for optimal functionality and durability.
- Cons: Limited customization options. Higher upfront cost compared to DIY options.
Ultimately, the choice between DIY and pre-built options depends on individual preferences, budget, and the level of customization desired.
Print Bed Leveling System
The print bed leveling system is an essential component of a 3D printer, ensuring precise and accurate printing results. The print bed calibration refers to the process of aligning the print bed with the printer’s nozzle to achieve a uniform and consistent layer height during printing. This is crucial for successful adhesion of the printed object to the print bed, preventing warping and ensuring the overall quality of the print.
One common method of print bed calibration is manual leveling, where the user adjusts the height of the print bed using screws or knobs until it is level with the nozzle. However, this process can be time-consuming and requires a certain level of skill and experience.
To simplify the calibration process, many modern 3D printers come equipped with automatic leveling systems. These systems utilize various sensors, such as proximity or capacitance sensors, to detect the distance between the nozzle and the print bed at multiple points. The printer then adjusts the height of the print bed accordingly, compensating for any unevenness or discrepancies, ensuring a level surface for printing.
Automatic leveling systems not only save time but also improve the printing accuracy and reliability, as they eliminate the human error factor associated with manual leveling. By ensuring proper print bed alignment, these systems contribute to the overall success of 3D printing projects.
Control Board and Firmware
To ensure smooth operation and precise control of the 3D printer, the control board and firmware work together to manage and coordinate various functions and movements. The control board is essentially the brain of the printer, responsible for interpreting instructions and sending signals to the different components. The firmware, on the other hand, is the software that runs on the control board, providing the necessary algorithms and control logic.
Here are three key aspects to consider when it comes to the control board and firmware:
-
Compatibility: Different printers require different control boards and firmware. It is essential to ensure that the control board and firmware are compatible with your specific 3D printer model. Using incompatible components can lead to errors and malfunctions.
-
Upgradability: Some control boards and firmware allow for firmware updates, which can bring new features, bug fixes, and performance improvements. Being able to upgrade the firmware can enhance the overall functionality and reliability of your 3D printer.
-
Troubleshooting: In case of any issues, troubleshooting the control board and firmware can help identify and resolve the problem. This can include checking connections, updating firmware, or resetting the control board.
LCD Display and User Interface
Utilizing an intuitive user interface, the LCD display allows for seamless navigation and control of the 3D printer’s functions and settings. The LCD display functionality is a crucial component of the 3D printer, providing users with real-time information and control options. The user interface design is focused on simplicity and ease of use, ensuring that even beginners can operate the printer with confidence.
The LCD display typically consists of a graphical interface that displays relevant information such as print progress, temperature, and settings. Users can easily navigate through menus using a series of buttons or a rotary encoder. The display also provides visual feedback, such as highlighting the currently selected option or displaying error messages.
One key feature of the LCD display is its ability to adjust various printer settings on the fly. Users can change parameters such as temperature, print speed, or filament type directly from the display, eliminating the need to rely on a computer for adjustments. This not only saves time but also allows for greater flexibility in the printing process.
Furthermore, the LCD display often supports the option to load and save print files directly from an SD card, eliminating the need for a constant connection to a computer. This feature enhances convenience and portability, as users can simply transfer their print files to the SD card and start printing without the need for a computer nearby.
Power Supply
Power supply is responsible for providing the necessary electrical energy to operate the various components of a 3D printer. It is an essential component that ensures the printer functions smoothly and efficiently. Here are three key points to understand about the power supply in a 3D printer:
-
Voltage Regulation: The power supply regulates the voltage to ensure a stable and consistent flow of electricity to the printer. This is crucial for maintaining the accuracy and precision of the printer’s movements and temperature control.
-
Temperature Control: The power supply plays a vital role in controlling the temperature of the printer. It provides power to the heating elements, such as the extruder and heated bed, enabling them to reach and maintain the desired temperature. This is important for successful printing, as different materials require specific temperatures for optimal results.
-
Safety Features: The power supply incorporates various safety features to protect both the printer and the user. It includes features like overvoltage protection, short circuit protection, and thermal protection. These safeguards prevent damage to the printer and reduce the risk of electrical hazards.
Cooling System
The cooling system in a 3D printer plays a crucial role in maintaining optimal temperatures and preventing overheating of key components. Efficient cooling is essential for ensuring the printer operates smoothly and produces high-quality prints consistently.
One of the main components of the cooling system is the fan, which is strategically placed to maximize cooling efficiency. The fan is typically positioned near the hot end of the printer, where the filament is melted and extruded. Its primary function is to cool the newly extruded filament rapidly, ensuring it solidifies and maintains its shape. This is particularly important for intricate designs with overhangs or bridges that require precise cooling to prevent sagging or warping.
To further enhance cooling efficiency, some 3D printers are equipped with multiple fans. These additional fans are strategically placed in different areas of the printer, such as the print bed or the stepper motor drivers, to provide targeted cooling to specific components.
Frequently Asked Questions
What Is the Ideal Temperature for the Hotend of a 3D Printer?
The ideal temperature for the hotend of a 3D printer is specific to the type of filament being used, but generally ranges from 180 to 230 degrees Celsius. Maintaining this temperature helps prevent filament jams and ensures optimal printing results.
How Often Should the Build Plate Be Cleaned and Maintained?
The build plate of a 3D printer should be cleaned and maintained regularly to ensure optimal performance. Effective cleaning techniques include using a non-abrasive cleaner and removing any debris or residue. The frequency of maintenance depends on usage and should be done as needed.
Can Any Type of Filament Be Used With a 3D Printer or Are There Specific Requirements?
Filament compatibility is an important consideration when using a 3D printer. Different printers have specific requirements for filament specifications, such as diameter and material type, to ensure optimal printing performance and quality results.
How Frequently Should the Print Bed Leveling System Be Calibrated?
The print bed leveling system of a 3D printer should be calibrated regularly to maintain print quality standards. This ensures that the nozzle is at the correct distance from the bed, preventing common leveling issues and ensuring accurate prints.
Is It Possible to Upgrade the Control Board and Firmware of a 3D Printer for Better Performance?
Yes, it is possible to upgrade the control board and firmware of a 3D printer to improve its performance. This allows for enhanced control and functionality, resulting in better print quality and increased efficiency.
Conclusion
In conclusion, the anatomy of a 3D printer consists of several key components. These include the extruder and hotend, build plate, filament spool holder, print bed leveling system, control board and firmware, LCD display and user interface, power supply, and cooling system.
These intricate parts work together seamlessly to bring imagination to life. They allow users to create three-dimensional objects with precision and detail.
The 3D printer is a marvel of technology, revolutionizing industries and inspiring innovation.


